Connecting to MotherDuck
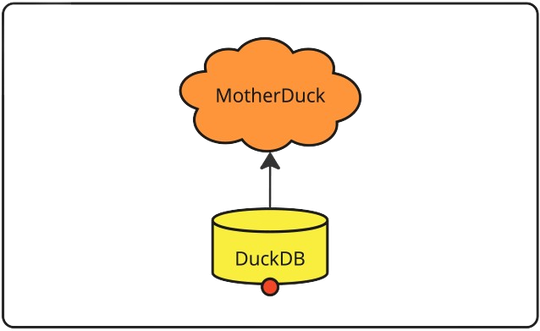
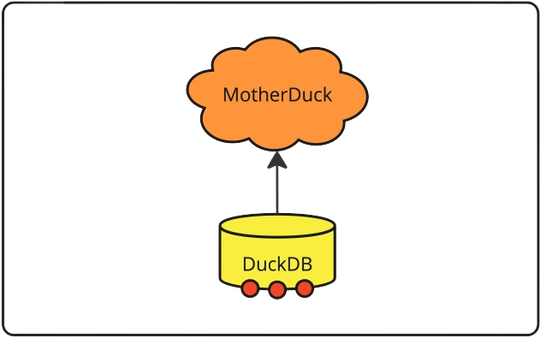
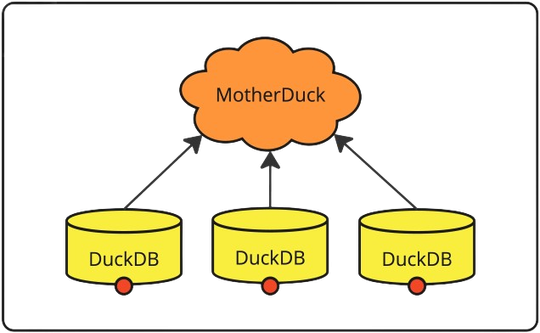
A single DuckDB connection executes one query at a time, aiming to maximize the performance of that query, making reuse of a single connection both simple and performant. We recommend starting with the simplest way of connecting to MotherDuck and running queries, and if that does not meet your requirements, to explore the advanced use-cases described in subsequent sections.
Create a connection

The below code snippets show how to create a connection to a MotherDuck database from the CLI, Python, JDBC and NodeJS language APIs.
For security reasons, it's generally recommended to use environment variables to store your MotherDuck token rather than hardcoding it in your application.
- Python
- JDBC
- NodeJS
- CLI
To connect to your MotherDuck database, use duckdb.connect("md:my_database_name"). This will return a DuckDBPyConnection object that you can use to interact with your database.
There are two ways to provide your access token in Python to authenticate your user session.
- Within a config dictionary
- Included in the connection string
import duckdb

# Create connection to your default database
conn = duckdb.connect("md:my_db", config={"motherduck_token" :<your-motherduck-token>}) # Optionally, import your token from a .env file

# Run query
conn.sql("CREATE TABLE items (item VARCHAR, value DECIMAL(10, 2), count INTEGER)")
conn.sql("INSERT INTO items VALUES ('jeans', 20.0, 1), ('hammer', 42.2, 2)")
res = conn.sql("SELECT * FROM items")

# Close the connection
conn.close()
import duckdb

# Create connection to your default database
conn = duckdb.connect(f"md:my_db?motherduck_token={<your-motherduck-token>}") # Optionally, import your token directly from a .env file

# Run query
conn.sql("CREATE TABLE items (item VARCHAR, value DECIMAL(10, 2), count INTEGER)")
conn.sql("INSERT INTO items VALUES ('jeans', 20.0, 1), ('hammer', 42.2, 2)")
res = conn.sql("SELECT * FROM items")

# Close the connection
conn.close()
To connect to your MotherDuck database, you can create a Connection by using the "jdbc:duckdb:md:databaseName" connection string format. For authentication, you need to provide a MotherDuck token.
There are two ways to provide the token:
- As a connection property
- As part of the connection string
import java.sql.Connection;
import java.sql.DriverManager;
import java.sql.Statement;
import java.sql.ResultSet;
import java.util.Properties;

// Create properties with your MotherDuck token
Properties props = new Properties();
props.setProperty("motherduck_token", "<your-motherduck-token>");

// Create connection to your database
try (Connection conn = DriverManager.getConnection("jdbc:duckdb:md:my_db", props);
     Statement stmt = conn.createStatement()) {

    stmt.executeUpdate("CREATE TABLE items (item VARCHAR, value DECIMAL(10, 2), count INTEGER)");
    stmt.executeUpdate("INSERT INTO items VALUES ('jeans', 20.0, 1), ('hammer', 42.2, 2)");

    try (ResultSet rs = stmt.executeQuery("SELECT * FROM items")) {
        while (rs.next()) {
            System.out.println("Item: " + rs.getString(1) + " costs " + rs.getInt(3));
        }
    }
}
// Create connection with token in the connection string
try (Connection conn = DriverManager.getConnection("jdbc:duckdb:md:my_db?motherduck_token=<your-motherduck-token>");
     Statement stmt = conn.createStatement()) {

    stmt.executeUpdate("CREATE TABLE items (item VARCHAR, value DECIMAL(10, 2), count INTEGER)");
    stmt.executeUpdate("INSERT INTO items VALUES ('jeans', 20.0, 1), ('hammer', 42.2, 2)");

    try (ResultSet rs = stmt.executeQuery("SELECT * FROM items")) {
        while (rs.next()) {
            System.out.println("Item: " + rs.getString(1) + " costs " + rs.getInt(3));
        }
    }
}
If an environment variable named motherduck_token is set, it will be used automatically.
To connect to your MotherDuck database, you can create a DuckDBInstance with the 'md:databaseName' connection string format:
import { DuckDBInstance } from '@duckdb/node-api';

// Create connection to your default database
const instance = await DuckDBInstance.create("md:mydb");
const conn = await instance.connect();

// Run queries
await conn.run('CREATE TABLE items (item VARCHAR, value DECIMAL(10, 2), count INTEGER)');
await conn.run("INSERT INTO items VALUES ('jeans', 20.0, 1), ('hammer', 42.2, 2)");
const result = await conn.runAndReadAll('SELECT * FROM items');
console.table(result.getRowObjects());
To connect to your MotherDuck database, run duckdb md:<database_name>.
duckdb "md:my_db"
Now, you will enter the DuckDB interactive terminal to interact with your database.
D CREATE TABLE items (item VARCHAR, value DECIMAL(10, 2), count INTEGER);
D INSERT INTO items VALUES ('jeans', 20.0, 1), ('hammer', 42.2, 2);
D SELECT * FROM items;
Read Scaling With Session Hints
If you are planning on multiple end users connecting with a Read Scaling Token, ensure each user can get a dedicated backend (up to the maximum configured flock size) by passing a session_hint in the connection string.
Session hints make sure that all the queries from the same end user are routed to the same backend Duckling, even if they originate from different services/servers. This allows for optimal caching and resource allocation for each specific user's needs.
After establishing the connection, it can be used the same way as any DuckDB/MotherDuck connection -- to run queries, and then either be closed explicitly or go out of scope, as in the examples above.
Note that this is a harmless no-op if the connection is made with a regular read/write token.
- Python
- JDBC
- NodeJS
import duckdb

# Create a connection and allocate a stable backend for user123.
con = duckdb.connect(
    "md:my_db?session_hint=user123",
    config = {'motherduck_token': '<your-motherduck-read-scaling-token>'} )
import java.sql.Connection;
import java.sql.DriverManager;
import java.sql.Statement;
import java.sql.ResultSet;
import java.util.Properties;

// Create properties with your MotherDuck token
Properties props = new Properties();
props.setProperty("motherduck_token", "<your-motherduck-read-scaling-token>");

// Create a connection and allocate a stable backend for user123.
try (Connection conn = DriverManager.getConnection("jdbc:duckdb:md:my_db?session_hint=user123", props)) {
    // ...
}
import { DuckDBInstance } from '@duckdb/node-api';

// Create a connection and allocate a stable backend for user123.
const instance = await DuckDBInstance.create(
    'md:my_db?session_hint=user123',
    { motherduck_token: '<your-motherduck-read-scaling-token>' } );
// ...
Multiple Connections and the Database Instance cache
DuckDB clients in Python, R, JDBC, and ODBC prevent redundant reinitialization by keeping instances of database-global context cached by the database path. Other language APIs are likely to get similar functionality over time.
When connecting to MotherDuck, the instance is cached for an additional 15 minutes after the last connection is closed (see Setting Custom Database Instance Cache TTL for how to override this value). For an application that creates and closes connections frequently, this could provide a significant speedup for connection creation, as the same catalog data can be reused across connections.
This means that only the first of multiple connections to the same database will take the time to load the MotherDuck extension, verify its signature, and fetch the catalog metadata.
- Python
- Java
- NodeJS
con1 = duckdb.connect("md:my_db")	// MotherDuck catalog fetched
con2 = duckdb.connect("md:my_db")	// MotherDuck catalog reused
// Create properties with your MotherDuck token
Properties props = new Properties();
props.setProperty("motherduck_token", "<your-motherduck-token>");

try (var con1 = DriverManager.getConnection("jdbc:duckdb:md:my_db", props); // MotherDuck catalog fetched
     var con2 = DriverManager.getConnection("jdbc:duckdb:md:my_db", props); // MotherDuck catalog reused
     ) {
    // ...
}
const instance = await DuckDBInstance.fromCache("md:sample_data");
const connection1 = await instance.connect();
const connection2 = await instance.connect();
Setting Custom Database Instance Cache Time (TTL)
By default, connections to MotherDuck established through the database instance caching supporting DuckDB APIs will reuse the same database instance for 15 minutes after the last connection is closed. In some cases, you may want to make that period longer (to avoid the redundant reinitialization) or shorter (to connect to the same database with a different configuration).
The database TTL value can be set either at the initial connection time, or by using the SET command at any point.
Any valid DuckDB Instant part specifiers can be used for the TTL value, for example '5s', '3m', or '1h'.
The examples below assume you have configured your MotherDuck token using one of the authentication methods described in the Create a connection section above.
- Python
- Java
con = duckdb.connect("md:my_db?dbinstance_inactivity_ttl=1h")
con.close()

# different database connection string (without `?dbinstance_inactivity_ttl=1h`), no instance cached; TTL is 15 minutes (default)
con2 = duckdb.connect("md:my_db")

# allow the database instance to expire immediately
con2.execute("SET motherduck_dbinstance_inactivity_ttl='0s'")

# the database instance can only expire after the last connection is closed
con2.close()

# new database instance with a new TTL (the 15 minute default)
con3 = duckdb.connect("md:my_db")
con3.close()

# the last TTL for this database was 15 minutes; the cached database instance will be reused
con4 = duckdb.connect("md:my_db")
The TTL can be set either through the connection string or through Properties. However, be careful when using Properties as the database instance cache is keyed by the connection string. This means that if you change the TTL in Properties between connections, you'll get an error as it's trying to connect to the same database with different configurations.
Here's an example that will fail:
Properties props = new Properties();
props.setProperty("motherduck_dbinstance_inactivity_ttl", "2m");

// First connection works fine
try (var con = DriverManager.getConnection("jdbc:duckdb:md:my_db", props)) {
    // TTL is set to 2m
}

// Changing TTL in properties will fail
props.setProperty("motherduck_dbinstance_inactivity_ttl", "5m");
try (var con = DriverManager.getConnection("jdbc:duckdb:md:my_db", props)) {
    // This will throw: "Can't open a connection to same database file
    // with a different configuration than existing connections"
}
For this reason, it's generally safer to set the TTL through the connection string:
// Set TTL through connection string
try (var con = DriverManager.getConnection("jdbc:duckdb:md:my_db?dbinstance_inactivity_ttl=1h")) {
    // TTL is set to 1h
}

// Different TTL creates a new instance
try (var con = DriverManager.getConnection("jdbc:duckdb:md:my_db?dbinstance_inactivity_ttl=30m")) {
    // This works - creates a new instance with 30m TTL
}

// Can also set TTL using SQL
try (var con = DriverManager.getConnection("jdbc:duckdb:md:my_db");
     var st = con.createStatement()) {
    // allow the database instance to expire immediately
    st.executeUpdate("SET motherduck_dbinstance_inactivity_ttl='0s'");
}
When using Properties, you must include the motherduck_ prefix for the TTL property name (i.e., motherduck_dbinstance_inactivity_ttl). This prefix is only optional when passing the TTL through the connection string.
Connect to multiple databases
If you need to connect to MotherDuck and run one or more queries in succession on the same account, you can use a single database connection. If you want to connect to another database in the same account, you can either reuse the same connection, or create copies of the connection.
- Python
- JDBC
- NodeJS
If you need to connect to multiple databases, you can either directly reuse the same DuckDBPyConnection instance, or create copies of the connection using the .cursor() method.
FROM <table name> is a shorthand version of
SELECT * FROM <table name>.
Example 1: Reuse the same DuckDB Connection

To connect to different databases in the same MotherDuck account, you can use the same connection object and simply fully qualify the names of the tables in your query.
conn = duckdb.connect("md:my_db")

res1 = conn.sql("FROM my_db1.main.tbl")
res2 = conn.sql("FROM my_db2.main.tbl")
res3 = conn.sql("FROM my_db3.main.tbl")

conn.close()
Example 2: Create copies of the initial DuckDB Connection

conn.cursor() returns a copy of the DuckDB connection, with a reference to the existing DuckDB database instance. Closing the original connection also closes all associated cursors.
conn = duckdb.connect("md:my_db")

cur1 = conn.cursor()
cur2 = conn.cursor()
cur3 = conn.cursor()

cur1.sql("USE my_db1")
cur2.sql("USE my_db2")
cur3.sql("USE my_db3")

res = []
for cur in [cur1, cur2, cur3]:
  res.append(cur.sql("SELECT * FROM tbl"))

# This closes the original DuckDB connection and all cursors
conn.close()
duckdb.connect(path) creates and caches a DuckDB instance. Subsequent calls with the same path reuse this instance. New connections to the same instance are independent, similar to conn.cursor(), but closing one doesn't affect others. To create a new instance instead of using the cached one, make the path unique (e.g., md:my_db?user=<unique ID>).
Example 3: Create multiple connections

You can also create multiple connections to the same MotherDuck account using different DuckDB instances. However, keep in mind that each connection takes time to establish, and if connection times are an important factor for your application, it might be beneficial to consider Example 1 or Example 2.
conn1 = duckdb.connect("md:my_db1")
conn2 = duckdb.connect("md:my_db2")
conn3 = duckdb.connect("md:my_db3")

res1 = conn1.sql("SELECT * FROM tbl")
res2 = conn2.sql("SELECT * FROM tbl")
res3 = conn3.sql("SELECT * FROM tbl")

conn1.close()
conn2.close()
conn3.close()
If you need to connect to multiple databases, you typically won't need to create multiple DuckDB instances. You can either directly reuse the same DuckDBConnection instance, or create copies of the connection using the .duplicate() method.
// Create connection with your MotherDuck token
Properties props = new Properties();
props.setProperty("motherduck_token", "<your-motherduck-token>");

try (DuckDBConnection duckdbConn = (DuckDBConnection) DriverManager.getConnection("jdbc:duckdb:md:my_db", props)) {
    Connection conn1 = duckdbConn.duplicate();
    Connection conn2 = duckdbConn.duplicate();
    Connection conn3 = duckdbConn.duplicate();
    // ...
}
If you need to connect to multiple databases, you can re-use the same DuckDBInstance and connection.
import { DuckDBInstance } from '@duckdb/node-api';

const conn = await DuckDBInstance.create('md:');

const result1 = await conn.runAndReadAll('FROM my_db1.main.tbl');
const result2 = await conn.runAndReadAll('FROM my_db2.main.tbl');