Managing Service Accounts
Guide - Create and configure a service account
This guide walks you through the process of creating service accounts, their associated access tokens, and configuring Ducklings (compute instances) with the MotherDuck UI or programmatically with the MotherDuck Admin REST API.
Prerequisites: All actions described below are only available to Admin users in your MotherDuck Organization.
API calls must be authenticated using an access token generated by an Admin user in your MotherDuck Organization. Pass this token in the Authorization header as Bearer YOUR_ADMIN_TOKEN.
This guide involves three main steps:
- Create a Service Account: Use the "Create new user" endpoint.
- Create an Access Token: Generate an access token for the newly created service account.
- Configure Ducklings: Set the size of read-write and read-scaling Ducklings for the service account.
Step 1: Create a New Service Account
- UI
- API via curl
- API via Python

-
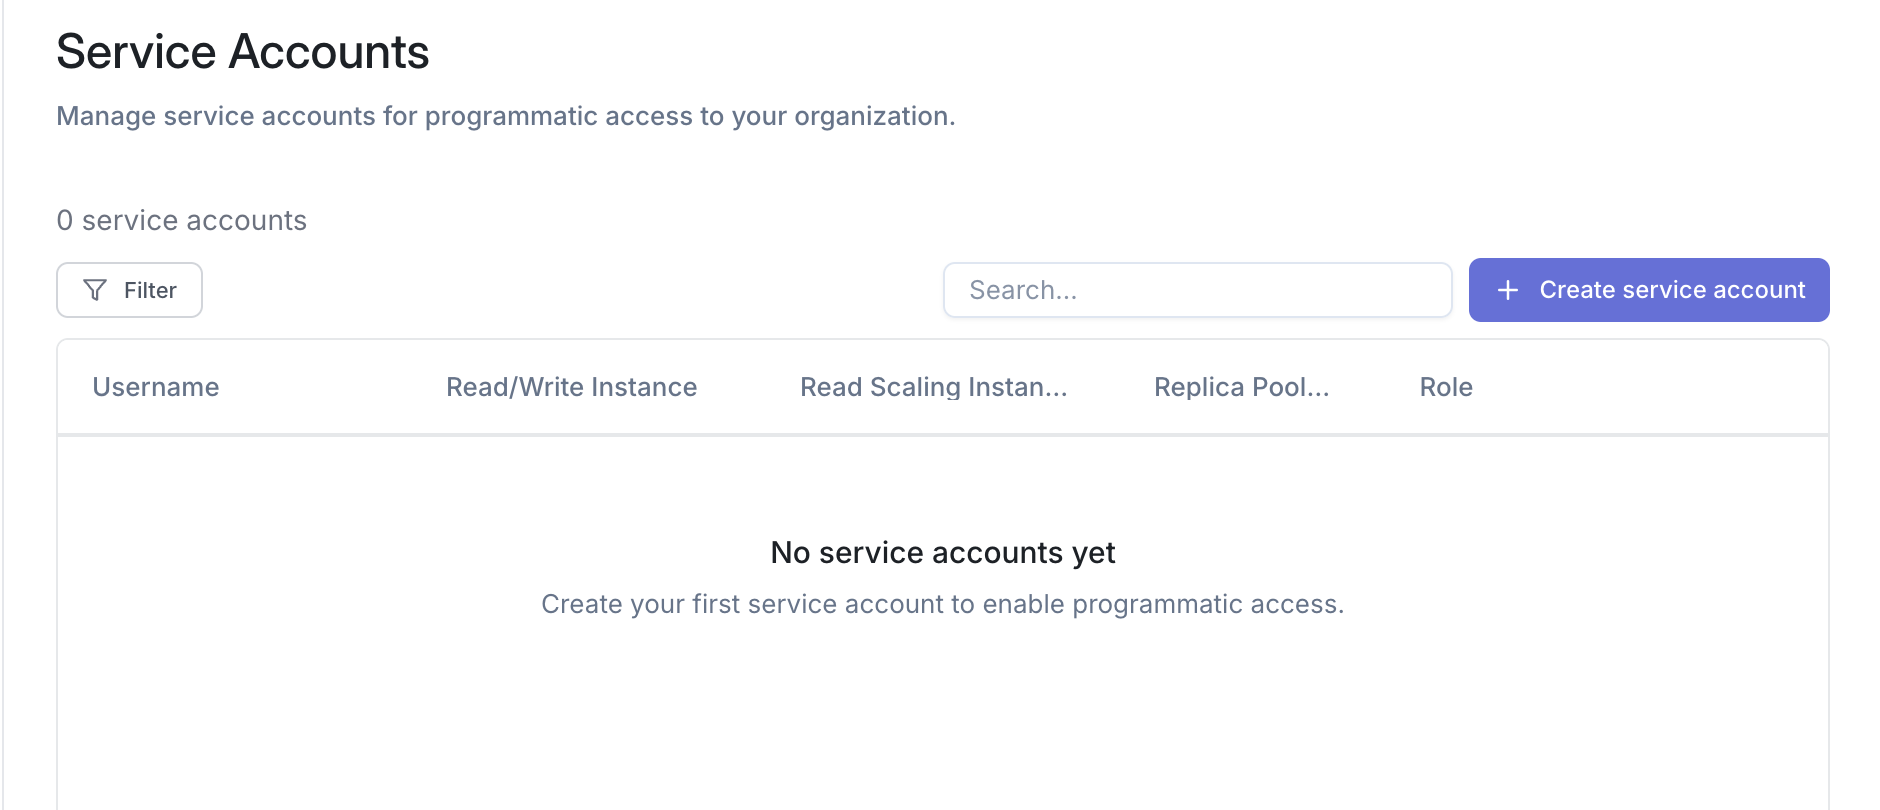
Navigate to the MotherDuck Web UI -> Settings -> Service Accounts
-
Click Create service account
-
Enter a username for the account (username can only contain characters, numbers, and underscores)
To create a service account, you will use the Create New User (service account) endpoint (the exact endpoint is POST /v1/users).
Refer to the endpoint documentation for full details on request parameters and responses.
Key details:
- You will define a
usernamefor your service account. - Important: For all subsequent API calls and identification, use the
usernameyou defined.
Example:
curl -X POST \
  https://api.motherduck.com/v1/users \
  -H "Authorization: Bearer YOUR_ADMIN_TOKEN" \
  -H "Content-Type: application/json" \
  -d '{
        "username": "my-service-account-001"
     }'
To create a service account, you will use the Create New User (service account) endpoint (the exact endpoint is POST /v1/users).
Refer to the endpoint documentation for full details on request parameters and responses.
Key details:
- You will define a
usernamefor your service account. - Important: For all subsequent API calls and identification, use the
usernameyou defined.
Example:
# /// script
# dependencies = ["requests"]
# ///
import requests

response = requests.post(
    'https://api.motherduck.com/v1/users',
    headers={
        'Authorization': 'Bearer YOUR_ADMIN_TOKEN',
        'Content-Type': 'application/json'
    },
    json={
        'username': 'my-service-account-001'
    }
)

if response.status_code == 200:
    service_account = response.json()
    print(f"Service account created: {service_account}")
else:
    print(f"Error: {response.status_code} - {response.text}")
Step 2: Create an Access Token for the Service Account
- UI
- API via curl
- API via Python

-
Click on the service account username to open details
-
Click Create token
-
Provide a token name
-
For organizations on the Business plan, select a token type. Select Read Scaling Token to leverage MotherDuck's Read Scaling feature
-
(Optional) Select Automatically expire this token to set the token's time-to-live
-
Click Create token. Immediately copy the token from the modal and store it securely. It won't be shown again once the modal is closed
Additional tokens can be created at any time from the service account's details.
Once the service account is created, you should generate an access token for it using the Create an Access Token endpoint (the exact endpoint is POST /v1/users/:username/tokens).
Refer to the endpoint documentation for full details.
Key details:
- The
:usernamein the path refers to theusernameyou chose in Step 1 (e.g.,my-service-account-001). - The path parameter
:usernameis a placeholder; replace it with the actual username. For example,/v1/users/my-service-account-001/tokens. - The
token_typeshould be set only if you are on the business plan and want to leverage MotherDuck's Read Scaling feature
Example:
curl -X POST \
  https://api.motherduck.com/v1/users/my-service-account-001/tokens \
  -H "Authorization: Bearer YOUR_ADMIN_TOKEN" \
  -H "Content-Type: application/json" \
  -d '{
        "name": "token-for-my-service-account-001",
        // "ttl": 300 # Optional parameter: token time-to-live in seconds (e.g., 5 minutes).
        // When ttl parameter is omitted token will not be set to expire
        "token_type": "read_write" // Or "read_scaling"
     }'
The response will contain the access token for your service account. Securely store this token as it will be used by your service account to authenticate with MotherDuck.
Once the service account is created, you should generate an access token for it using the Create an Access Token endpoint (the exact endpoint is POST /v1/users/:username/tokens).
Refer to the endpoint documentation for full details.
Key details:
- The
:usernamein the path refers to theusernameyou chose in Step 1 (e.g.,my-service-account-001). - The path parameter
:usernameis a placeholder; replace it with the actual username. For example,/v1/users/my-service-account-001/tokens. - The
token_typeshould be set only if you are on the business plan and want to leverage MotherDuck's Read Scaling feature - To automatically expire the token, set the optional
ttlparameter to the token's uptime in seconds.
Example:
# /// script
# dependencies = ["requests"]
# ///
import requests

response = requests.post(
    'https://api.motherduck.com/v1/users/my-service-account-001/tokens',
    headers={
        'Authorization': 'Bearer YOUR_ADMIN_TOKEN',
        'Content-Type': 'application/json'
    },
    json={
        'name': 'token-for-my-service-account-001',
        'token_type': 'read_write'  # Or 'read_scaling',
        'ttl': '300' # OPTIONAL - Token will be valid for 300 seconds (5 minutes)
    }
)

if response.status_code == 200:
    token_data = response.json()
    print(f"Token created successfully!")
    print(f"Token: {token_data['token']}")
    # Securely store this token
else:
    print(f"Error: {response.status_code} - {response.text}")
The response will contain the access token for your service account. Securely store this token as it will be used by your service account to authenticate with MotherDuck.
Step 3: Set Account Ducklings (Configure Compute)
- UI
- API via curl
- API via Python

-
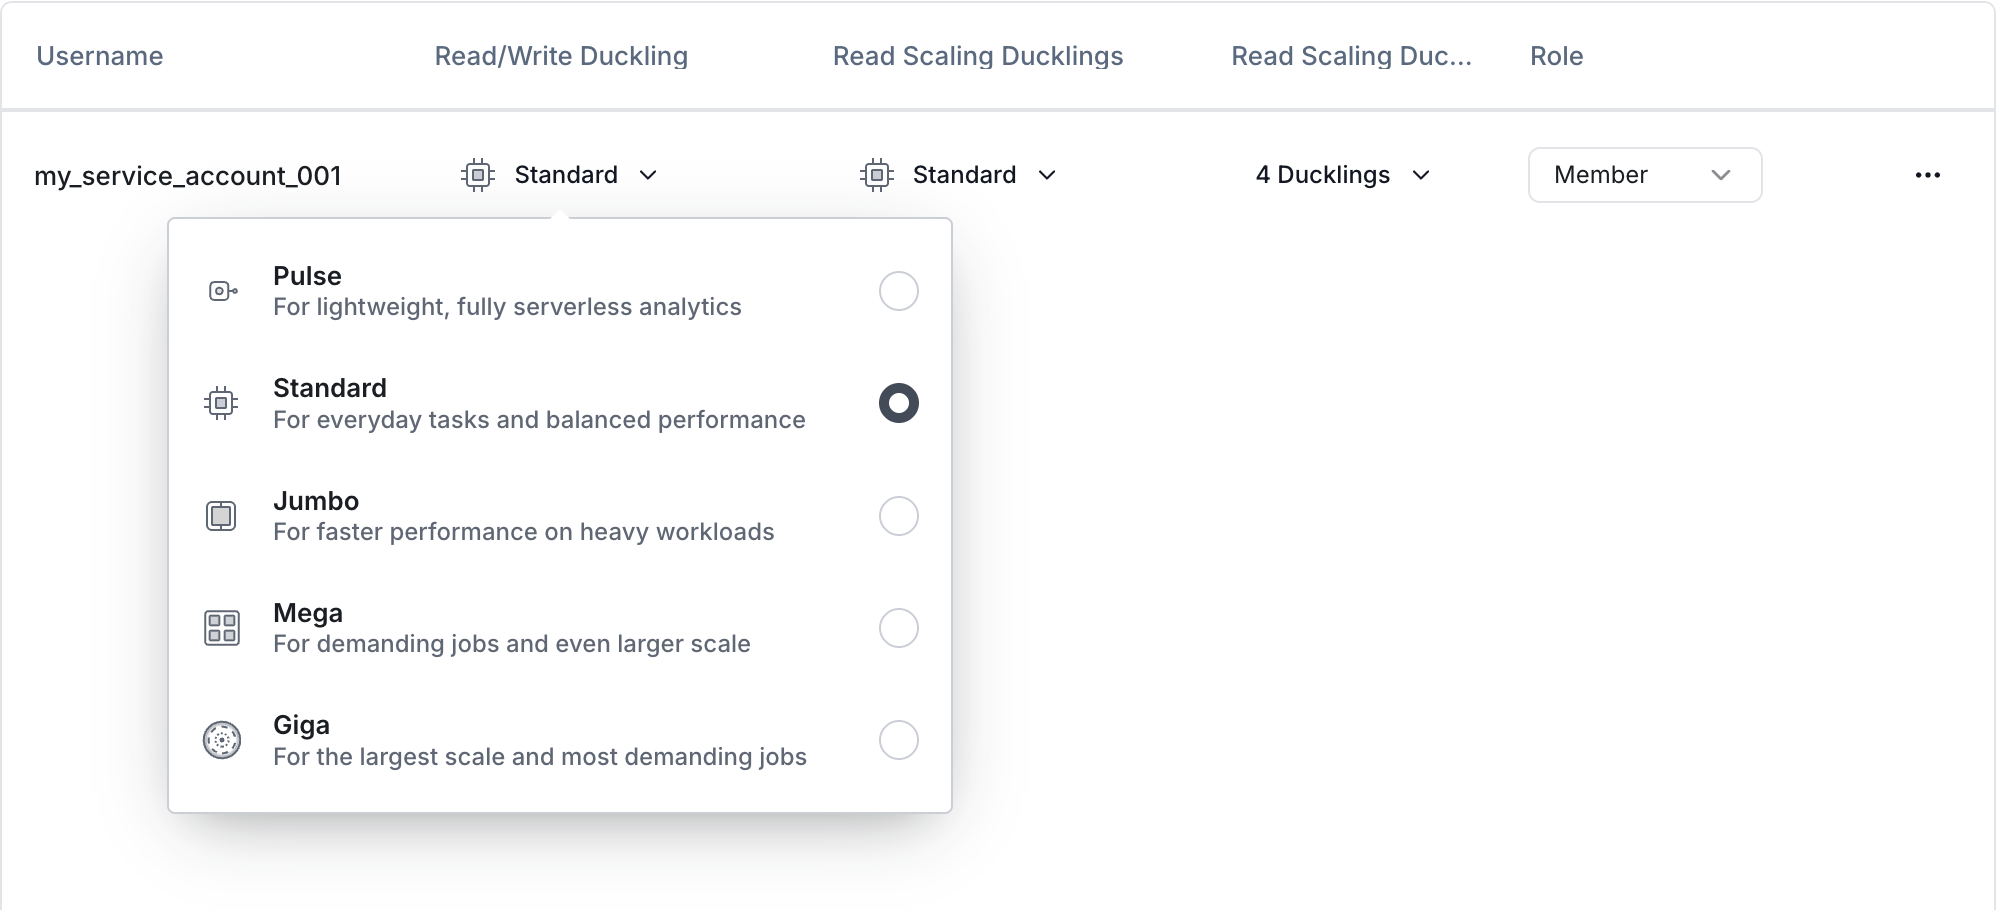
Set the read/write Duckling size for the account using the dropdown under the Read/Write Duckling header
-
For organizations on the Business plan using read scaling, set the account's read scaling Duckling size and replica pool size using the respective dropdowns.
To define the size of Ducklings provisioned for the service account, use the "set user Ducklings" endpoint. (The exact endpoint is PUT /v1/users/:username/instances).
Refer to the Set User Ducklings endpoint documentation for details on the correct payload and available Duckling sizes.
Key details:
- The
:usernamein the path is the service account:usernamefrom Step 1. - This endpoint is used to set both read-write and read-scaling Ducklings
- You always need to pass the entire body, even though you are only interested in changing only one of the two Duckling configs
Example:
curl -X PUT \
  https://api.motherduck.com/v1/users/my-service-account-001/instances \
  -H "Authorization: Bearer YOUR_ADMIN_TOKEN" \
  -H "Content-Type: application/json" \
  -d '{
  "config": {
    "read_write": {
      "instance_size": "jumbo"
    },
    "read_scaling": {
      "instance_size": "pulse",
      "flock_size": 16
    }
  }
}'
To define the size of Ducklings provisioned for the service account, use the "set user Ducklings" endpoint. (The exact endpoint is PUT /v1/users/:username/instances).
Refer to the Set User Ducklings endpoint documentation for details on the correct payload and available Duckling sizes.
Key details:
- The
:usernamein the path is the service account:usernamefrom Step 1. - This endpoint is used to set both read-write and read-scaling Ducklings
- You always need to pass the entire body, even though you are only interested in changing only one of the two Duckling configs
Example:
# /// script
# dependencies = ["requests"]
# ///
import requests

response = requests.put(
    'https://api.motherduck.com/v1/users/my-service-account-001/instances',
    headers={
        'Authorization': 'Bearer YOUR_ADMIN_TOKEN',
        'Content-Type': 'application/json'
    },
    json={
        'config': {
            'read_write': {
                'instance_size': 'jumbo'
            },
            'read_scaling': {
                'instance_size': 'pulse',
                'flock_size': 16
            }
        }
    }
)

if response.status_code == 200:
    print("Ducklings configured successfully!")
else:
    print(f"Error: {response.status_code} - {response.text}")
Summary
By following these steps, you can create and configure service accounts for your MotherDuck organization. Remember to:
- Use an Admin account or token for all management operations.
- Securely store the generated service account tokens.
- Use the chosen service account
usernamein any API calls.
The REST API methods for managing service accounts are in 'Preview' and may change in the future.
For detailed information on each API call, always refer to the specific endpoint documentation.
Impersonate Service Accounts (UI Only)
- UI
- DuckDB Client API or CLI
Admin users can log into the MotherDuck UI as a service account in the organization using the Impersonation feature. Impersonation allows admins to view and interact with the MotherDuck Web UI by impersonating the service account, which is useful for manually performing read-write actions, monitoring ongoing query activity, or testing and troubleshooting service account-specific resources.

-
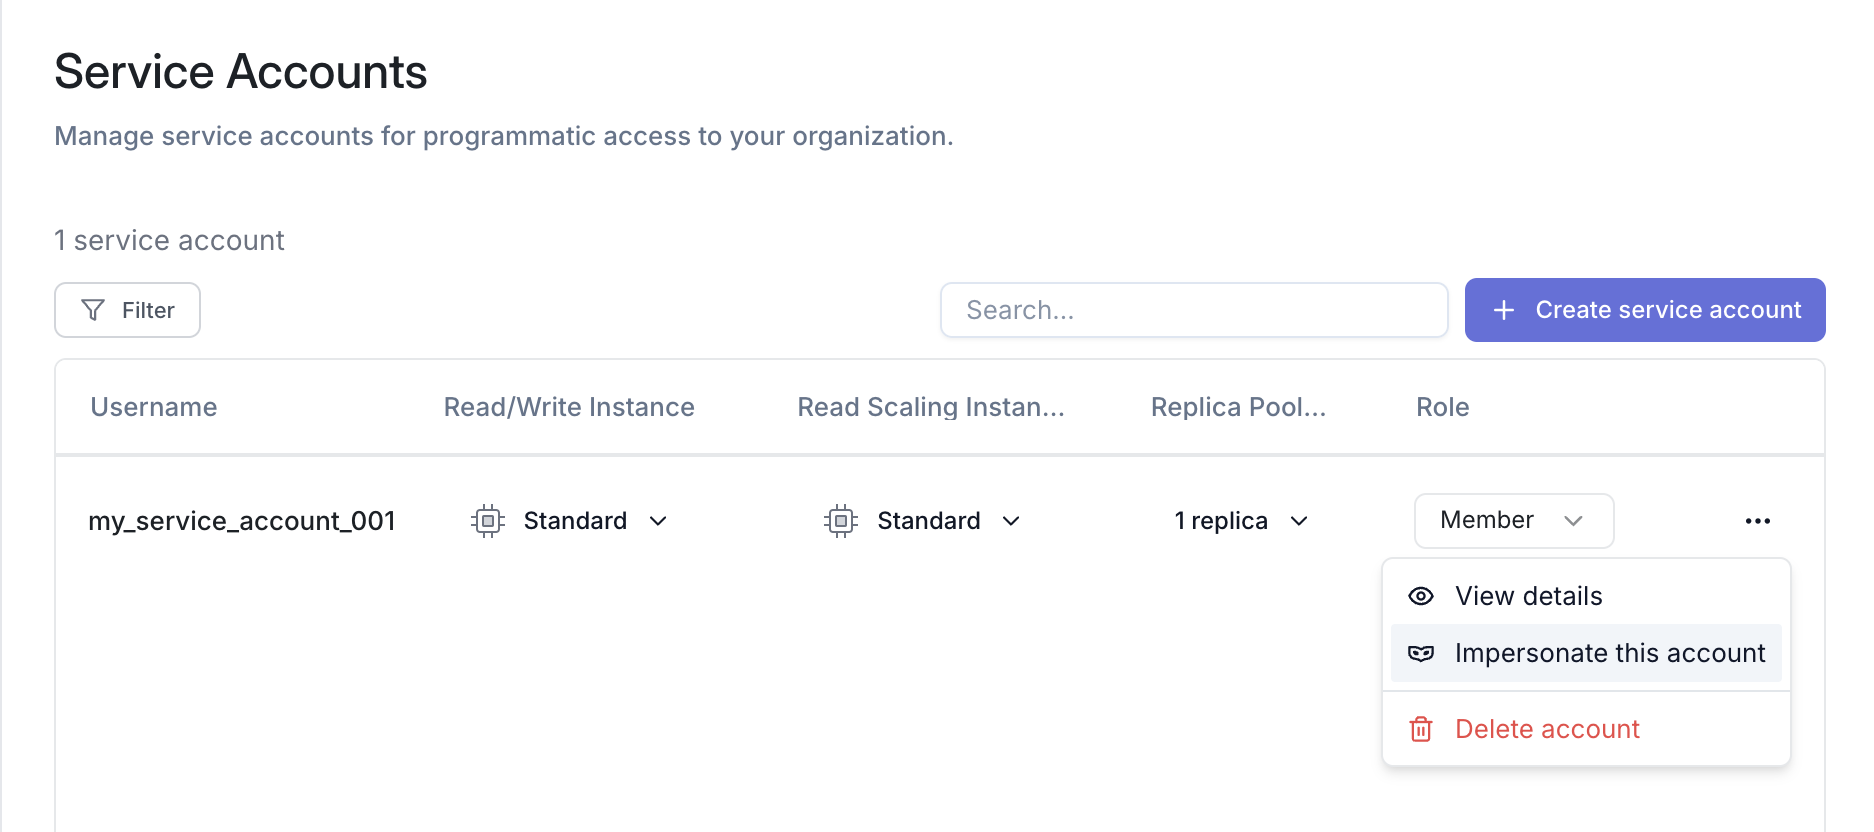
Click the trident (⋮) next to the service account you want to impersonate
-
Select Impersonate this account from the dropdown
-
The MotherDuck UI will refresh, and you will be logged into the MotherDuck Web UI as that service account. While impersonating, a persistent banner will be shown at the top of the UI, with options to Refresh session or Return to admin
-
Impersonation sessions expire after two hours. Refresh the browser tab to reset the expiry countdown

You can bookmark the URL while in an impersonation session to generate a new impersonation session using that same service account at a future time.
You must be logged into the MotherDuck Web UI as an Admin user for the URL to successfully start a new impersonation session.
Service account impersonation is currently only available through the MotherDuck Web UI. Use service account tokens to authenticate with service accounts outside of the MotherDuck Web UI.
Managing Service Accounts and Tokens
Accounts
- UI
- API via Python
Navigate to the MotherDuck Web UI -> Settings -> Service Accounts

- New service accounts can be created by clicking the Create service account button above the account list
- The Duckling settings for each account can be managed using the Duckling size and pool size dropdowns in the list
- To view a service account's tokens and details, click the account's username in the list, or click the trident (⋮) next to the service account, and select View details
- Service accounts can be deleted by clicking the trident (⋮) next to the service account, and selecting Delete account
- When a service account is deleted, all tokens associated with the service account are immediately revoked
- View Service Accounts
- Delete Service Accounts
- To view the service accounts associated with your MotherDuck account, use the List Access Tokens endpoint.
- Be sure to refer to the API reference docs for full details on request parameters and responses.
# /// script
# dependencies = ["requests","pprint"]
# ///
import requests
import pprint

url = "https://api.motherduck.com/v1/users/"

payload = {}
headers = {
  'Accept': 'application/json',
  'Authorization': 'Bearer YOUR_ADMIN_TOKEN' # Replace with your admin token
}

admin_user = :username

response = requests.request("GET", url + admin_user + "/tokens", headers=headers, data=payload)
pprint.pprint(response.json()) # Easier to read with many tokens
- To delete a service account, use the Delete a User endpoint.
- Be sure to refer to the API reference docs for full details on request parameters and responses.
NOTE: When deleting accounts, please double check your username. This operation cannot be undone!
# /// script
# dependencies = ["requests","pprint"]
# ///
import requests
import pprint

url = "https://api.motherduck.com/v1/users/"

payload = {}
headers = {
  'Accept': 'application/json',
  'Authorization': 'Bearer YOUR_ADMIN_TOKEN' # Replace with your admin token
}
target_user = :username

response = requests.request("DELETE", url + target_user, headers=headers, data=payload)
pprint.pprint(response.text)
Tokens
- UI
- API via Python
Navigate to the MotherDuck Web UI -> Settings -> Service Accounts

- To view a service account's tokens, click the account's username in the list, or click the trident (⋮) next to the service account, and select View details
- Each valid token for a service account and its type (Read/Write or Read Scaling), creation time, and expiry time is listed in the service account details
- To revoke a token for a service account, click the three-dots (…) next to the token, and select Revoke token. A confirmation prompt will appear, select Revoke token

- View tokens
- Revoke a token
- To view a service account's tokens, use the List Access Tokens endpoint. From there, you can see the token type, token ID, creation time, and expiration time.
- Be sure to refer to the API reference docs for full details on request parameters and responses.
# /// script
# dependencies = ["requests","pprint"]
# ///
import requests
import pprint

url = "https://api.motherduck.com/v1/users/"

payload = {}
headers = {
  'Accept': 'application/json',
  'Authorization': 'Bearer YOUR_ADMIN_TOKEN' # Replace with your admin token
}

target_user = :username

response = requests.request("GET", url + target_user +  "/tokens", headers=headers, data=payload)
pprint.pprint(response.json()) # Easier to read with many tokens
- To revoke a token, use the Invalidate a Token endpoint. You will need the token ID and its associated username.
- Be sure to refer to the API reference docs for full details on request parameters and responses.
NOTE: When deleting tokens, please double check your username and token_id. This operation cannot be undone!
# /// script
# dependencies = ["requests","pprint"]
# ///
import requests
import pprint

url = "https://api.motherduck.com/v1/users/"

payload = {}
headers = {
  'Accept': 'application/json',
  'Authorization': 'Bearer YOUR_ADMIN_TOKEN' # Replace with your admin token
}

target_user = :username
token_id = :token_id

response = requests.request("DELETE", url + target_user +  "/tokens/" + token_id, headers=headers, data=payload)
pprint.pprint(response.text)